
Transforming Video Moments into Stunning Photos: A Step-by-Step Guide
Ever find yourself in the tragic situation of missing that Instagram-worthy snapshot, only to realize later that it’s doing the Macarena within a video clip? Fear not, my fellow visual treasure hunters, because in this comprehensive guide, we’re going to spill the beans on how to turn your run-of-the-mill videos into gallery-worthy pictures that’ll make your camera roll blush. Whether you’re a camera-wielding pro on the hunt for the Holy Grail of still shots buried in your video stash or just a pixel-peeping enthusiast looking to immortalize those “should’ve been a photo” moments, you’re in the right neck of the woods for all the secret sauce you need.
So, gather your preferred video clips, and let’s embark on a journey to convert these video snippets into remarkable photographs. By the conclusion of this guide, you’ll have acquired the expertise to transform any video into a stunning collection of gallery-worthy photos.
Understanding the Magic: How Can You Make a Photo from a Video?
Now, before we dive headfirst into the process, let’s uncover the enchanting secret behind turning a video frame into a solo superstar photo. Picture this: videos are like flipbooks for grown-ups, just a bunch of individual snapshots thrown together in rapid succession to make it seem like people and things are actually moving. Shocking, right? But here’s the kicker: every single one of those frames is, wait for it, a bona fide photograph!
Ever wondered how many frames crash the party in a standard one-minute video? Brace yourself for the math showdown! If a video is strutting its stuff at 30 frames per second (fps), that humble one-minute video will be hosting a wild party with a jaw-dropping guest list of 1,800 frames! It’s like stumbling upon a hidden treasure trove of potential photos just waiting to burst onto the scene. Time to start mining those golden frames!
Choosing the Right Video for the Job
The first step in this transformative journey is selecting the video clip that contains the moment you want to capture as a photo. Keep in mind that not all videos are created equal when it comes to photo quality. Here are some things to consider:
1. Resolution Matters
Higher-resolution videos generally yield better-quality photos. If you have the option, go for videos shot in 4K or 1080p. The more pixels you have, the more details you can extract.
2. Steady Footage
Smooth, stable video footage will result in clearer photos. Shaky, handheld shots might produce blurry stills. If necessary, use video stabilization tools to improve the quality.
3. Lighting Conditions
Pay attention to the lighting in your video. Well-lit scenes with good contrast often lead to stunning photos. Natural light or properly set up studio lighting can work wonders.
Imagine you have a video of a friend blowing out birthday candles. The moment is heartwarming, but the video has slightly shaky moments due to laughter. By choosing a steadier portion, you can ensure a clear photo of the candle-blowing moment.
The Tools of the Trade
Now that you’ve chosen your video, it’s time to gather the necessary tools. Luckily, you don’t need a professional photography studio for this. All you need is a computer, some software, and a bit of patience.
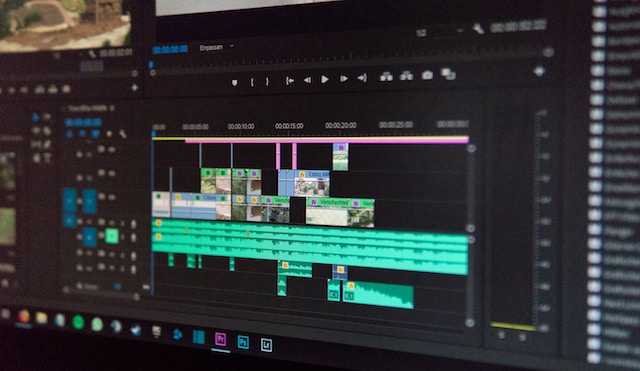
1. Video Editing Software
You’ll need video editing software to play, pause, and extract frames from your video. Popular options include Adobe Premiere Pro, Final Cut Pro, and even free software like DaVinci Resolve.
2. A Computer with Ample Processing Power
Video editing can be resource-intensive, so make sure your computer can handle the load. A faster CPU and plenty of RAM will help the process go smoothly.
3. A Keen Eye and Patience
This isn’t a technical tool, but it’s equally important. You’ll need a discerning eye to spot the perfect frame and patience to work through the video frame by frame.
If you’re a beginner, start with a shorter video to get the hang of the process before tackling longer clips.
The Step-by-Step Process
Let’s get into the heart of the matter: the step-by-step process of how to make a photo from a video.
1. Import Your Video
Open your chosen video editing software and import the video clip you want to work with. Most software allows you to simply drag and drop the video into the workspace.
2. Navigate to the Desired Frame
This is where the magic happens. Play the video and pause at the moment you want to capture as a photo. Use the frame-by-frame navigation controls to find that perfect frame.
Did you know that movies are typically shot at 24 fps, while TV shows often use 30 fps? This slight difference in frame rate can impact the visual feel of the content.
3. Extract the Frame
Once you’ve found the perfect frame, it’s time to extract it as a photo. In most video editing software, there’s an option to export or save the current frame as an image file. Choose a format like JPEG or PNG for the best quality.
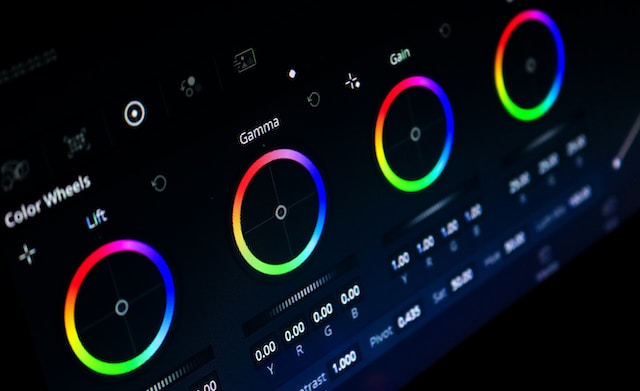
4. Enhance Your Photo (Optional)
If you want to take your photo to the next level, consider some post-processing. You can use image editing software like Adobe Photoshop or Lightroom to adjust brightness, contrast, and color to your liking.
Let’s say you’ve extracted a frame of a sunset from a video. You can enhance the colors to make the photo even more vibrant, creating a breathtaking image.
5. Save Your Masterpiece
Don’t forget to save your newly created photo in a location of your choice. You can now share it, print it, or keep it as a cherished memory.
Advanced Techniques for Stunning Photos
For those looking to elevate their photo game, here are some advanced techniques to consider:
1. Burst Mode Videos
Burst Mode Videos are a hidden gem for those seeking to extract the perfect photo from a dynamic scene. Unlike standard video recording, which captures a continuous stream of frames at a consistent frame rate (e.g., 24 or 30 fps), Burst Mode Videos go the extra mile. Here’s how they work:
Rapid-Fire Frame Capture
When you activate Burst Mode on your camera or smartphone, you’re essentially instructing it to fire off a rapid sequence of photos in quick succession. This feature can capture anywhere from 10 to 30 frames per second, depending on your device.
Imagine you’re trying to photograph a friend’s basketball slam dunk. With Burst Mode, you can capture multiple frames as they jump, reach the peak of their jump, and make the epic dunk, ensuring you don’t miss the perfect moment.
A Bounty of Choices
The beauty of Burst Mode lies in the wealth of choices it offers. Instead of hoping for that one perfect frame in a regular video, you get a series of frames to select from. This dramatically increases your chances of capturing the exact moment you desire.
Do you know why Burst Mode is often associated with fast-moving subjects like sports or wildlife photography? Hint: It has to do with the unpredictability of these subjects.
Finding the Diamond in the Rough
Once you’ve captured a burst of frames, you can carefully review them to find the diamond in the rough. This might be a fraction of a second where the subject’s expression is just right, a sports player’s mid-air acrobatics are at their peak, or a bird’s wings are perfectly outstretched.
Selecting the Ideal Frame
With Burst Mode, the pressure of capturing the perfect moment is greatly reduced. You can then choose the ideal frame from the sequence and extract it as a high-quality photo. This is particularly advantageous for scenarios where timing is critical and getting that one perfect shot is paramount.
Creative Freedom
Burst Mode isn’t just a tool for precision; it’s also a means of unlocking your creative potential. You can experiment with different angles, perspectives, and compositions within a short burst, giving you room to explore your artistic vision.
2. Slow-Motion Videos
Slow-motion videos capture more frames per second, allowing you to extract incredibly detailed and dramatic photos. This is perfect for action shots or capturing intricate details.
Can you guess how many frames per second are typically used in slow-motion videos? Hint: it’s often much higher than the standard 24 or 30 fps.
Conclusion: From Video to Visual Masterpiece
In this guide, we’ve unlocked the secret to transforming video moments into stunning photos. With the right video, tools, and techniques, you can turn any video frame into a visual masterpiece. Whether you’re a professional photographer or an amateur enthusiast, this skill is sure to come in handy.
So, the next time you’re capturing life’s moments on video, remember that you have the power to freeze those moments in time and turn them into works of art. With practice and a discerning eye, you’ll soon be creating photos that tell stories and evoke emotions, all from the magic of video frames.
Now, it’s your turn to embark on this creative journey. Grab your favorite video clips, follow the steps outlined in this guide, and watch as your video moments are transformed into stunning photos that you’ll cherish forever.

Since 2019, Sabrina has been sharing her expertise as the author of three online courses, making photography and videography accessible to all, regardless of age or talent. Her blog, moonlight3d, serves as a hub for connecting with her audience, offering valuable tips on software, videography, and personal experiences. Feel free to reach out to Sabrina for insights and guidance on your creative journey through photography and videography.