

5 Ways to Record Screen and Audio on Mac
In our modern digital age, there’s a growing demand to capture and share the events transpiring on your Mac screen, accompanied by crystal-clear sound. Whether you’re crafting instructive content, showcasing software, or simply divulging your gaming escapades to acquaintances and admirers, the knack for recording your Mac screen and audio has become an invaluable asset.
Gratefully, there exist a number of potent tools and strategies accessible to Mac users, which empower the fulfillment of this task with efficiency and efficacy. Within the confines of this all-encompassing guide, we shall delve into five prime approaches to record screen and audio on your Mac. These options span the spectrum from innate functionalities to external software solutions. Let us embark on this journey!
1. Built-in Screen Recording with QuickTime Player
If you’re looking for a simple and cost-free solution to record your Mac screen and audio, QuickTime Player, the default multimedia player on macOS, has you covered. It comes pre-installed on every Mac and offers basic screen recording capabilities.
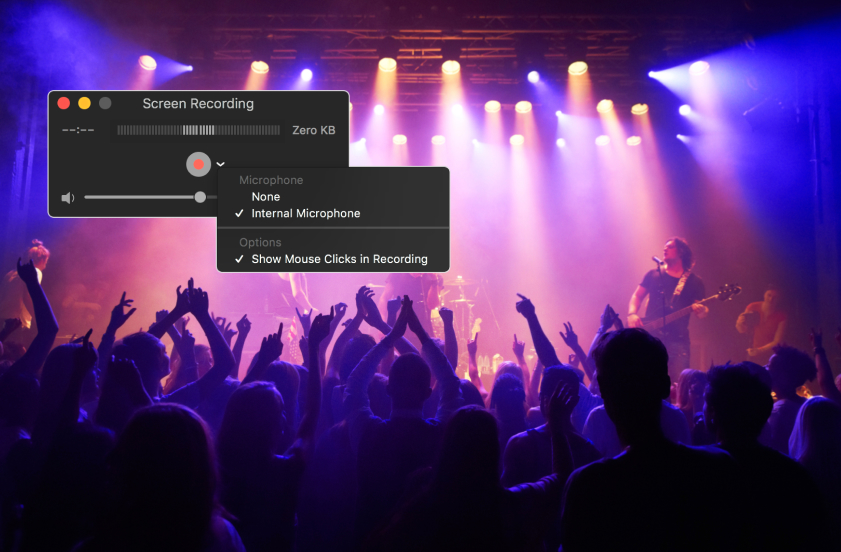
How to use QuickTime Player for screen recording:
- Open QuickTime Player from your Applications folder.
- In the menu bar, click on “File” and select “New Movie Recording.”
- Click the small arrow next to the record button to reveal the recording options. Here, you can choose your microphone input for audio recording and set the video quality.
- Click the red record button to start recording your screen and audio.
- To stop recording, click the stop button in the menu bar.
Pros:
- Quick and easy access, as it’s pre-installed on all Macs.
- Basic functionality for straightforward recording needs.
- Good for capturing video tutorials, presentations, or simple demos.
Cons:
- Limited features compared to third-party options.
- May not be ideal for high-quality, professional recordings.
- No advanced editing capabilities.
2. ScreenFlow – The All-in-One Screen Recording and Editing Tool
If you’re seeking a more comprehensive solution for screen recording and audio capture on your Mac, ScreenFlow is a top choice. It offers a suite of powerful features, including advanced editing and post-production capabilities, making it a favorite among content creators, educators, and professionals.
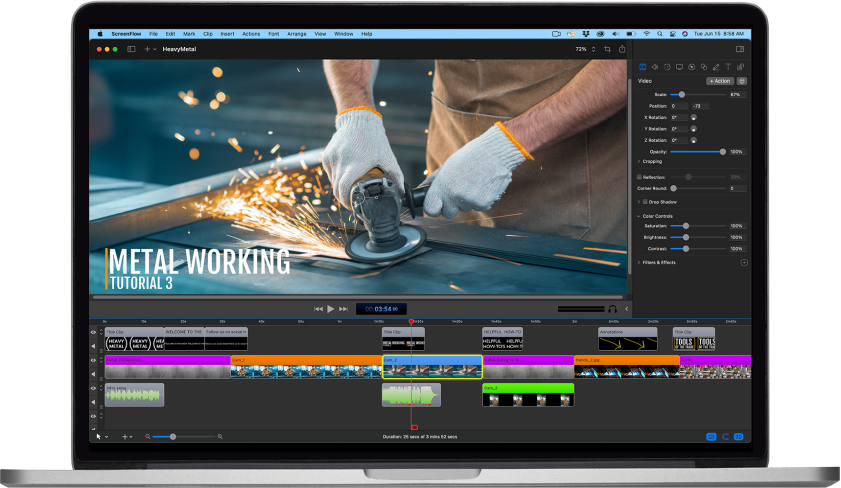
How to use ScreenFlow for screen recording:
- Download and install ScreenFlow from the official website or the Mac App Store.
- Open ScreenFlow and click “New Recording” in the welcome screen.
- Configure your recording settings, including screen capture area, microphone input, and webcam options.
- Click the red record button to start recording your screen and audio.
- After recording, you can edit your video using ScreenFlow’s robust editing tools.
- Export your video in various formats and resolutions.
Pros:
- Comprehensive screen recording and editing capabilities in one application.
- Advanced features like video and audio editing, annotations, and animations.
- Ideal for creating professional-quality videos, tutorials, and presentations.
Cons:
- Paid software with a one-time purchase fee or subscription model.
- May have a steeper learning curve for beginners due to its extensive feature set.
3. OBS Studio – The Open-Source Streaming and Recording Software
For those who require advanced screen recording and live streaming capabilities, OBS Studio (Open Broadcaster Software) is a versatile open-source solution. While initially designed for live streaming, it can also function as a powerful screen recorder with audio capture.
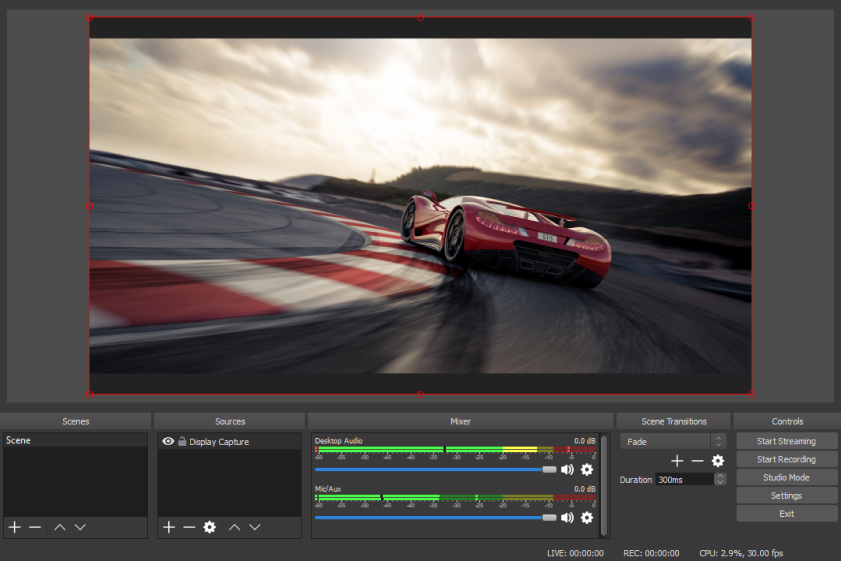
How to use OBS Studio for screen recording:
- Download and install OBS Studio from the official website.
- Launch OBS Studio and configure your settings under “Settings” in the bottom-right corner.
- Set up your scenes and sources. You can add your display capture as a source and configure your audio inputs.
- Click “Start Recording” to initiate the screen recording process.
- To stop recording, click “Stop Recording.”
Pros:
- Free and open-source software with an active community.
- Supports live streaming in addition to screen recording.
- Extensive customization options for scenes and sources.
Cons:
- May be overwhelming for beginners due to its interface and extensive settings.
- Lack of built-in editing tools; you’ll need additional software for post-production.
4. Capto – The User-Friendly Screen Capture and Editing Tool
Capto is a user-friendly screen recording and editing tool designed specifically for Mac users. It offers an intuitive interface and a range of features to help you capture your screen and audio effortlessly.
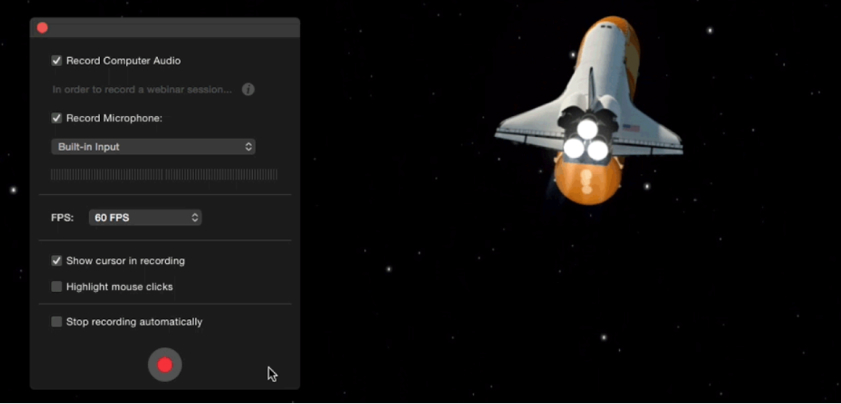
How to use Capto for screen recording:
- Download and install Capto from the Mac App Store or the developer’s website.
- Open Capto and click the “Record” button in the toolbar.
- Configure your recording settings, including screen capture area, microphone input, and webcam options.
- Click the “Record” button to start capturing your screen and audio.
- After recording, you can edit your video using Capto’s built-in editing tools.
- Export your video in various formats and resolutions.
Pros:
- User-friendly interface, making it suitable for beginners.
- Offers both screen recording and basic editing tools in one application.
- Ideal for creating instructional videos, tutorials, and quick demos.
Cons:
- Requires a one-time purchase or subscription.
- Not as feature-rich as some other paid options.
5. ApowerREC – The Cloud-Based Screen Recording Solution
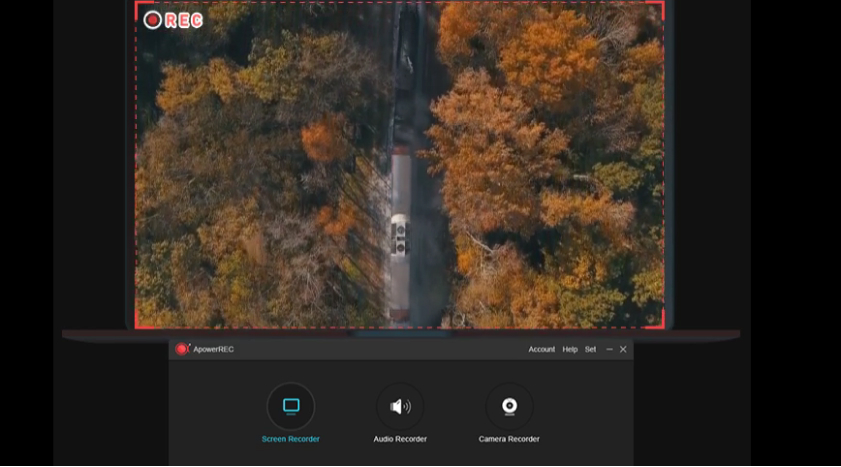
ApowerREC is a cloud-based screen recording solution that offers convenience and versatility for Mac users. It allows you to capture your screen and audio with ease, and you can access your recordings from any device with an internet connection.
How to use ApowerREC for screen recording:
- Visit the ApowerREC website and download the Mac version.
- Install and open ApowerREC.
- Configure your recording settings, including screen area and audio source.
- Click the “Start Recording” button to begin capturing your screen and audio.
- Once you’ve finished recording, you can access your recordings on the ApowerREC website.
Pros:
- Cloud-based storage for easy access to recordings from any device.
- Offers a range of recording options, including full screen, custom regions, and webcam overlay.
- Features built-in video editing tools.
Cons:
- Requires an internet connection to access recordings.
- The free version has limitations, and a subscription is needed for full access.
Tips for Recording Screen and Audio on Mac
Recording your screen and audio on a Mac can be a valuable skill for various purposes, such as creating tutorials, sharing presentations, or capturing memorable moments in games or video chats. To ensure you get the best results, consider these tips:
- Choose the Right Software:
Selecting the appropriate screen recording software is crucial. Consider your needs, budget, and technical expertise when making a choice. Options range from built-in macOS features like QuickTime Player to third-party software like ScreenFlow or OBS Studio.
- Plan Your Content:
Before hitting the record button, have a clear plan for what you want to capture. Outline the key points you want to cover, and if you’re demonstrating something, rehearse it to ensure a smooth recording.
- Optimize Your Mac Settings:
Ensure your Mac’s settings are configured for optimal screen recording:
- Check and adjust the screen resolution for the best quality.
- Disable notifications to prevent interruptions during recording.
- Close unnecessary background applications to free up system resources.
- Set the Recording Area:
Choose the portion of your screen that you want to record. Most recording software allows you to select the entire screen or a specific window. Be mindful of what’s within the recording frame.
- Adjust Audio Settings:
For audio recording, test your microphone and adjust its settings. Make sure it’s positioned correctly and is set to an appropriate volume level. Also, select the correct audio input source in your recording software.
- Use a Quality Microphone:
Investing in a good-quality external microphone can significantly enhance your audio recording. USB microphones, lavalier microphones, and shotgun microphones are popular choices for recording clean and clear audio.
- Monitor Audio Levels:
Keep an eye on your microphone’s audio levels while recording. Avoid peaking or clipping, which can result in distorted audio. Most recording software provides visual indicators for audio levels.
- Record in a Quiet Environment:
Choose a quiet recording environment to minimize background noise. Close windows, doors, and mute any noisy appliances or fans in the vicinity.
- Record in Good Lighting:
If you’re recording video alongside your screen capture, ensure adequate lighting. Well-lit environments improve video quality and make your content more engaging.
- Test Before Final Recording:
Before recording the final version, do a test run. Check that everything is set up correctly, your microphone is working, and your screen capture area is accurate.
- Keyboard Shortcuts:
Many screen recording software programs offer keyboard shortcuts for starting, pausing, and stopping recordings. Familiarize yourself with these shortcuts to streamline your workflow.
- Save and Organize Files:
Create a structured file organization system to keep your recordings tidy. Name files descriptively and save them in folders that make it easy to locate specific content later.
- Edit and Enhance:
After recording, use video editing software to trim, cut, and enhance your content. You can add overlays, captions, and annotations to make your videos more informative and engaging.
- Export with Care:
When exporting your recorded videos, choose an appropriate file format and resolution. Balance video quality with file size to ensure easy sharing and playback.
- Back Up Your Recordings:
Don’t forget to back up your recordings regularly. Use external hard drives, cloud storage, or other backup solutions to prevent data loss.
- Stay Informed:
Keep up with software updates and new features in your chosen screen recording software. Updates may offer performance improvements and additional functionality.
- Seek Feedback:
Share your recordings with trusted friends or colleagues for feedback. Constructive criticism can help you improve your recording and presentation skills.
- Practice and Refine:
Recording screen and audio content is a skill that improves with practice. Continuously refine your techniques and experiment with new approaches to create engaging content.
Conclusion
Recording your Mac screen and audio has never been easier, thanks to the variety of tools and software solutions available. Depending on your needs, budget, and level of expertise, you can choose from the built-in simplicity of QuickTime Player, the comprehensive features of ScreenFlow, the open-source power of OBS Studio, the user-friendly Capto, or the cloud-based convenience of ApowerREC.
Each of these options has its own set of pros and cons, so take the time to explore and determine which one aligns best with your specific recording and editing requirements. Whether you’re a content creator, educator, or professional, you now have the tools at your disposal to create high-quality screen recordings on your Mac, complete with crystal-clear audio. Start recording and sharing your knowledge and experiences with the world today!
Frequently Asked Questions
What should I do if my screen recording’s audio quality is poor?
If you’re facing issues with poor audio quality in your screen recordings, there are several steps you can take to improve it:
- Check Your Microphone: Begin by ensuring that your microphone is in good working order and free from physical obstructions. Check the microphone’s physical condition and connections. Make sure it’s properly plugged in or connected to your computer.
- Control Background Noise: Recording in a quiet environment can make a significant difference in audio quality. To minimize background noise, close windows and doors, and consider muting or turning off any noisy devices or appliances nearby.
- Adjust Microphone Settings: Most recording software provides options to adjust your microphone’s sensitivity or gain settings. Experiment with these settings to prevent audio distortion or clipping. Pay attention to visual indicators for audio levels in your recording software to ensure they stay within a healthy range.
- Consider an External Microphone: For even better audio quality, think about using an external microphone. USB microphones or dedicated audio recording equipment can significantly enhance the clarity and fidelity of your audio. They often offer superior noise cancellation and sound capture capabilities.
Can I edit my screen recordings after capturing them?
Absolutely, you can edit your screen recordings to enhance their quality and content. Here’s what you need to know:
- Built-in Editing Tools: Most screen recording software provides basic editing features that allow you to edit your recordings. These features typically include options to trim, cut, and enhance your videos. You can also add overlays, captions, annotations, and other elements to make your videos more informative and engaging.
- Dedicated Video Editing Software: If you require more advanced editing capabilities, consider using dedicated video editing software like Adobe Premiere Pro, Final Cut Pro, or iMovie (for Mac users). These professional-grade programs offer a wide range of tools for advanced video editing, including special effects, transitions, and audio adjustments.
- Backup Your Originals: It’s crucial to save backup copies of your original recordings before making any edits. Editing changes are often irreversible, and having a backup ensures you can revert to the original recording if needed. Create a separate folder to store your original files for safekeeping.

Since 2019, Sabrina has been sharing her expertise as the author of three online courses, making photography and videography accessible to all, regardless of age or talent. Her blog, moonlight3d, serves as a hub for connecting with her audience, offering valuable tips on software, videography, and personal experiences. Feel free to reach out to Sabrina for insights and guidance on your creative journey through photography and videography.